Showing posts with label yummy. Show all posts

Wednesday, February 5, 2014

How to "Pretzel" Anything


Ever bite into one of those pretzel buns and thought, "Hey, this is just a regular bun with a pretzel outside!"  Well, that's because it is!   Basically in order to turn something into a pretzel you make your normal bread dough and then you do the following steps.  Enjoy your pretzeled life from now on!  But be careful, pretzeling may cause excessive eating of such things that are pretzeled!!

I have made a couple different pretzel recipes and this is the technique they always use, but the first time I did it I seriously felt like I was doing everything wrong.  That is why I decided to take pictures and write this post so you all can feel confident and know that you aren't doing anything wrong. 

First you just start with your normal dough for whatever you were making… bread sticks, rolls, buns, bread, whatever!  After it has risen all of the way you begin the process.  I am using rolls now. 


You mix water with baking soda (I put 6 cups to 4 tablespoons of baking soda) in a large frying pan and let it come to a simmer. 


It starts to steam baking soda everywhere and it looks like you are a mad scientist! 


Then you put the raw dough in the lightly boiling baking soda water for 30-60 seconds on each side.  I know, it seems really weird and I doubted myself horribly when I first did this, but it's right! 


After they have been boiled in the baking soda on each side take them out and place them on your greased cookie sheet.  They look really old and gross when they come out. 


Next you are going to whip up an egg white and baste it over the top of them


Then you grind salt over the top. 


Since I was making rolls, I sliced them down the middle to create a nice split when they baked. 


Then you bake them until they look like pretzels and voila everyone thinks you are an amazing cook!


If you pretzel anything, tell me about it on here!  I want to know!


Here are the directions put together so you don't have to scroll =)

What you need:
6 Cups Water
4 Tablespoons Baking Soda
1 Egg White
Salt
Dough from whatever you are making

1. Start with your normal dough for whatever you were making… bread sticks, rolls, buns, bread, whatever!  After it has risen all of the way you begin the process.  I am using rolls now. 
2. You mix water with baking soda (I put 6 cups to 4 tablespoons of baking soda) in a large frying pan and let it come to a simmer. 
3. Then you put the raw dough in the lightly boiling baking soda water for 30-60 seconds on each side.  
4. After they have been boiled in the baking soda on each side take them out and place them on your greased cookie sheet.  
5.  Whip up an egg white and baste it over the top of them
6.  Grind salt over the top of them
7.  I sliced them down the middle to create a nice split when they baked
8.  Bake them until they look like pretzels, everything is different


Magnificent Coconut Mango Frozen Yogurt

For Christmas, Eric got me this wonderful Kitchen Aid Ice Cream Bowl.   I absolutely love it and have had a ton of fun exploring some of the possibilities I can do with it!   I made Egg Nog Ice Cream, Regular Ice Cream, and Double Chocolate Custard (that was my favorite).  But none of those things are healthy for me and I am the kind of person, that if it is in my house, I will eat it.  So I starting thinking of HEALTHY things I could make in it.  Then I came to the idea to make FROZEN YOGURT!

I didn't start with a recipe, in fact I didn't even want to look for one.  I had an idea of how to make it in my head and so I set out and did it!  It tasted SO GOOD and it was healthy for me!


We had these frozen mango chunks from Trader Joes that we got for smoothies a long time ago and we never really used them, so I decided I would whip those babies out.   We had 2 cups of them left, so that is what I started with.   I thawed them in warm water first. 


Then I placed them in this awesome guy we got as a wedding gift!   It's a food processor but it has 4 different cups which all have their own lids so they double as tupperware.  Also, this little guy is SUPER fast and not big and bulky.  So, I put them in there and chopped them until they weren't getting any smoother. 


It wasn't as smooth as I wanted it to be, so I pushed it through a mesh strainer into a bowl until this is all that was left in the strainer. 


This is what came through the strainer, nice smooth mango cream stuff.  


I added 1 1/2 Cups of Whole Milk Organic Yogurt (I meant to get greek yogurt but this was on sale) and I stirred until well combined.  Then I added the sugar and coconut and stirred some more. 


I placed it in my Kitched Aid Ice Cream Maker and let it go for about 15 - 20 minutes until it was ice cream consistency.   And this is what I ended up with!  IT WAS SO GOOD!  I was so proud of myself coming up with a recipe for something that I had never tried before! 


I placed what was left of it in a frozen bowl (so it would melt when it hit the bowl and freeze badly) and put it in the freezer!   It didn't stay as soft when it was frozen but it thawed out after a bit and tasted WONDERFUL!   

So here is the recipe:

2 Cups Frozen or Fresh Mango Chunks 
1 1/2 Cups Plain Yogurt 
1/2 Cup Finely Chopped Coconut 
1/3 Cup Sugar 

1.  Place thawed mango chunks in a food processor or blender and blend until smooth
2.  Place a mesh strainer over a medium bowl and push pureed mango through strainer until no more liquid is left
3. Add yogurt, coconut, and sugar and stir until well combined 
4. Place Yogurt Mixture in ice cream maker and follow manufactures instructions 
5. For best taste serve immediately
6.  If you have to freeze it, place it a frozen bowl, cover, and place in freezer.  Set out on counter for 5 minutes before eating.  


Thursday, January 9, 2014

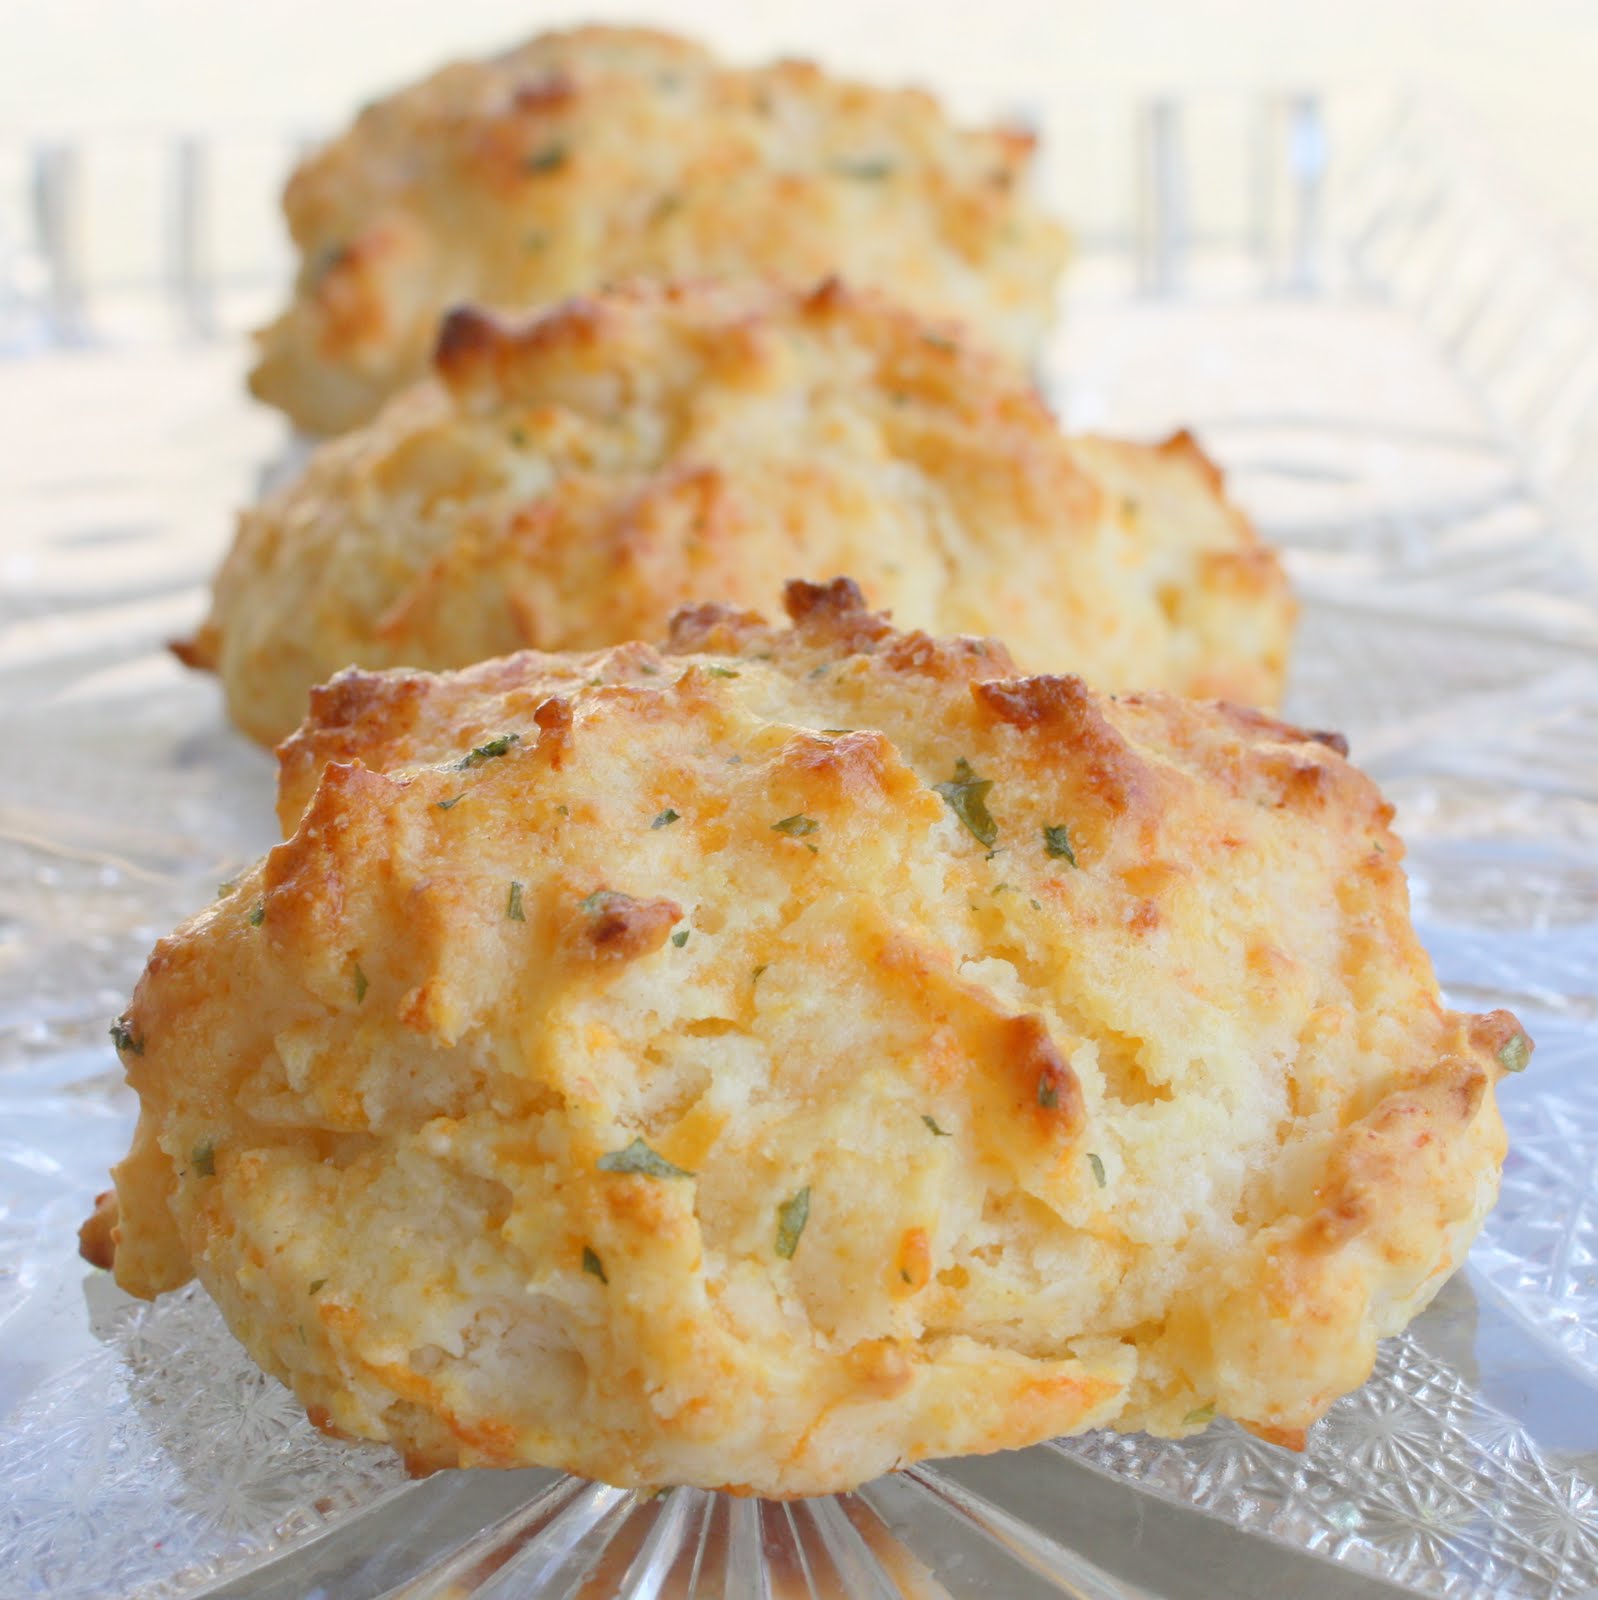
The Best Cheddar Bay Biscuits

So, I have tried about 15 different Cheddar Bay Biscuit recipes until I decided to start combining them to create my own.  This recipe is THE BEST. 

Most of the recipes call for garlic powder, I switched it with minced garlic.  Then I put the oregano inside the biscuits instead of on top and voila!  They were out of this world!  I gave one to Eric and he literally fell on the floor (we are a little dramatic about it).  

BAKING TIP:  I always bake things on my pampered chef stone because they don't stick and they never burn on the bottom.  But, if you don't have a stone then you can use a regular baking sheet and just grease it. 


Here's the recipe:

2 Cups Bisquick 
3 Cloves Garlic, Minced
1 1/2 Cups Cheddar Cheese (shredded)
2/3 Cup Milk
1 tsp (ish) Oregano
2 Tablespoons Melted Butter (for the top) 

1. Preheat oven to 400.  Grease a baking sheet. 
2. Combine bisquick, garlic, cheese, milk, and oregano in a bowl.   
3. Once the dough is mixed well, place it right onto the greased baking sheet (I usually use my small melon baller), make sure they are not smoothed out, they need to be kind of spiky. 
4. Bake for 10 minutes (or until golden brown on top). 
5. Meanwhile, melt the butter and grab a baster brush for when the biscuits come out. 
6. Once biscuits come out, place them onto a serving platter and baste with butter then grind some fresh sea salt over them.  
7. Serve warm and try not to eat all of them yourself! Enjoy!  


Tuesday, January 7, 2014

Homemade Hot Chocolate with Baileys

On the first day of the monster snow storm of 2014, Eric and I went for a walk before the negative temperatures set in.  When we got back we wanted something yummy to warm us up so I found this amazing hot chocolate recipe and I added to it.  


If you want the original recipe, go here.

First, I had to scale it down because it was only Eric and I.  Second, I wanted it right then and there so I had to make it on the stove not the crockpot.  Oh, and I had to add Baileys to give us that extra warmth on the cold winter night.  I made it in my wonderful new lodge cast iron pot!

Oh, and it was easy! 


Then I added homemade whipped cream on top which was WAY easier than I ever expected with my beautiful pink Kitchen Aid. 


Here is my recipe

2 1/2 Cups Milk
1/4 Cup Cocoa Powder
1/4 Cup White Sugar
1/2 Cup Hot Water
4 shots of Bailey's (optional) 
1/4 cup of heavy whipping cream

1. In medium sauce pan heat up sugar, cocoa powder, and water over medium-low heat until it is smooth. 
2. Add milk and Bailey's and heat until it is the desired temperature. 
3. While it is heating, put heavy whipping cream in a bowl and mix it with a stand mixer or hand mixer until it is cream. 
4. Put in fun fancy mugs (ours are from our dear friend Lizzy) and enjoy! 


Total Pageviews